Tutorial
Topics
In this tutorial, we’ll walk you through the creation of a basic voting application.
We’ll assume that you have Blitz installed already. You can tell if Blitz is installed, and which version you have by running the following command in your terminal:
blitz -vIf Blitz is installed, you should see the version of your installation. If it isn’t, you’ll get an error saying something like “command not found: blitz”.
Creating a new app
From the command line, cd into the folder where you’d like to create
your app, and then run the following command:
blitz new my-blitz-appBlitz will create a my-blitz-app folder in your current folder. You will
be asked how you want your new app to be. For this tutorial, select all
the default values by only pressing Enter when asked (you'll create a
Full Blitz app with TypeScript, npm and React Final Form).
Let’s look at what blitz new created:
my-blitz-app
├── src/
│   ├── auth/
│   │   ├── components/
│   │   │   ├── LoginForm.tsx
│   │   │   └── SignupForm.tsx
│   │   ├── mutations/
│   │   │   ├── changePassword.ts
│   │   │   ├── forgotPassword.test.ts
│   │   │   ├── forgotPassword.ts
│   │   │   ├── login.ts
│   │   │   ├── logout.ts
│   │   │   ├── resetPassword.test.ts
│   │   │   ├── resetPassword.ts
│   │   │   └── signup.ts
│   │   └── validations.ts
│   ├── core/
│   │   ├── components/
│   │   │   ├── Form.tsx
│   │   │   └── LabeledTextField.tsx
│   │   └── layouts/
│   │       └── Layout.tsx
│   ├── users/
│   │   ├── hooks/
│   │   │   └── useCurrentUser.ts
│   │   └── queries/
│   │       └── getCurrentUser.ts
│   ├── pages/
│   │   ├── api/
│   │   │   └── rpc/
│   │   │       └── [[...blitz]].ts
│   │   ├── auth/
│   │   │   ├── forgot-password.tsx
│   │   │   ├── login.tsx
│   │   │   └── signup.tsx
│   │   ├── _app.tsx
│   │   ├── _document.tsx
│   │   ├── 404.tsx
│   │   └── index.tsx
│   ├── blitz-client.ts
│   └── blitz-server.ts
├── db/
│   ├── migrations/
│   ├── index.ts
│   ├── schema.prisma
│   └── seeds.ts
├── integrations/
├── mailers/
│   └── forgotPasswordMailer.ts
├── public/
│   ├── favicon.ico*
│   └── logo.png
├── test/
│   └── setup.ts
├── README.md
├── next.config.js
├── vitest.config.ts
├── package.json
├── tsconfig.json
├── types.d.ts
├── types.ts
└── yarn.lock
These files are:
The
src/folder has Blitz setup files —blitz-client.tsandblitz-server.ts. This is also where you’ll put any queries/mutations or some of your components.The
src/pages/folder is the primary pages folder. You'll put all your pages and API routes here.The
src/core/folder is the main place to put components, hooks, etc that are used throughout your app.db/is where your database configuration goes. If you’re writing models or checking migrations, this is where to go.public/is a folder where you will put any static assets. If you have images, files, or videos which you want to use in your app, this is where to put them..npmrc,.env, etc. ("dotfiles") are configuration files for various bits of JavaScript tooling.next.config.jsis for advanced custom configuration of Blitz and Next.js.tsconfig.jsonis our recommended setup for TypeScript.
You can read more about the file structure here.
The development server
Now make sure you are in the my-blitz-app folder, if you haven’t
already, and run the following command:
blitz devYou’ll see the following output on the command line:
✔ Compiled
Loaded env from /private/tmp/my-blitz-app/.env
warn  - You have enabled experimental feature(s).
warn  - Experimental features are not covered by semver, and may cause unexpected or broken application behavior. Use them at your own risk.

ready - started server on 0.0.0.0:3000, url: http://localhost:3000
event - compiled successfully
Now that the server’s running, visit localhost:3000 with your web browser. You’ll see a welcome page, with the Blitz logo. It worked!
Sign up as a user
Blitz apps are created with user signup and login already set up! So let's
try it. Click on the Sign Up button. Enter any email and password and
click Create Account. Then you'll be redirected back to the home page
where you can see your user id and role.
If you want, you can also try logging out and logging back in. Or click Forgot your password? on the login page to try that flow.
Write your first page
Next let's create your first page.
Open the file pages/index.tsx and replace the contents of the Home
component with this:
//...

const Home: BlitzPage = () => {
  return (
    <div>
      <h1>Hello, world!</h1>

      <Suspense fallback="Loading...">
        <UserInfo />
      </Suspense>
    </div>
  )
}

//...
Save the file and you should see the page update in your browser. You can customize this as much as you want. When you’re ready, move on to the next section.
Database setup
Good news, an SQLite database was already set up for you! You can run
blitz prisma studio in the terminal to open a web interface where you
can see the data in your database.
Note that when starting your first real project, you may want to use a more scalable database like PostgreSQL, to avoid the pains of switching your database down the road. For more information, see Database overview. For now, we will continue with the default SQLite database.
Scaffolding code for our models
Blitz provides a handy CLI command called generate for
scaffolding out boilerplate code. We'll use generate to create two
models: Question and Choice. A Question has the text of the question
and a list of choices. A Choice has the text of the choice, a vote
count, and an associated question. Blitz will automatically generate an
id, a creation timestamp, and a last updated timestamp for both models.
First, we'll generate everything pertaining to the Question model:
blitz generate all question text:stringAnd when prompted, press the Enter to run prisma migrate which will
update your database schema with the new model. It will ask for a name, so
type something like "add question".
CREATE    src/pages/questions/[questionId].tsx
CREATE    src/pages/questions/[questionId]/edit.tsx
CREATE    src/pages/questions/index.tsx
CREATE    src/pages/questions/new.tsx
CREATE    src/questions/components/QuestionForm.tsx
CREATE    src/questions/queries/getQuestion.ts
CREATE    src/questions/queries/getQuestions.ts
CREATE    src/questions/mutations/createQuestion.ts
CREATE    src/questions/mutations/deleteQuestion.ts
CREATE    src/questions/mutations/updateQuestion.ts

✔ Model 'Question' created in schema.prisma:

>
> model Question {
>   id        Int      @id @default(autoincrement())
>   createdAt DateTime @default(now())
>   updatedAt DateTime @updatedAt
>   text      String
> }
>

✔ Run 'prisma migrate dev' to update your database? (Y/n) · true
Environment variables loaded from .env
Prisma schema loaded from db/schema.prisma
Datasource "db": SQLite database "db.sqlite" at "file:./db.sqlite"

✔ Enter a name for the new migration: … add question
The following migration(s) have been created and applied from new schema changes:

migrations/
  └─ 20210722070215_add_question/
    └─ migration.sql

Your database is now in sync with your schema.

✔ Generated Prisma Client (4.0.0) to ./node_modules/@prisma/client in 187ms
The generate command with a type of all generates a model and queries,
mutation and page files. See the Blitz generate page for
a list of available type options.
Next we'll generate the Choice model with corresponding queries and mutations.
We'll pass a type of resource this time as we don't need to generate
pages for the Choice model:
blitz generate resource choice text votes:int:default=0 belongsTo:questionIf you get an error run blitz prisma format
Note that this doesn't require a database migration because we haven't
added the Choice field to the Question model yet. So we are choosing
false when prompted to run the migration:
CREATE    src/choices/queries/getChoice.ts
CREATE    src/choices/queries/getChoices.ts
CREATE    src/choices/mutations/createChoice.ts
CREATE    src/choices/mutations/deleteChoice.ts
CREATE    src/choices/mutations/updateChoice.ts

✔ Model for 'choice' created in schema.prisma:

> model Choice {
>   id         Int      @default(autoincrement()) @id
>   createdAt  DateTime @default(now())
>   updatedAt  DateTime @updatedAt
>   text       String
>   votes      Int      @default(0)
>   question   Question @relation(fields: [questionId], references: [id])
>   questionId Int
> }

? Run 'prisma migrate dev' to update your database? (Y/n) › false
Lastly let's update the Question model to have a relationship back to Choice.
Open db/schema.prisma and add choices Choice[] to the Question
model.
model Question {
  id        Int      @id @default(autoincrement())
  createdAt DateTime @default(now())
  updatedAt DateTime @updatedAt
  text      String
+ choices   Choice[]
}
Now we can run the migration to update our database:
blitz prisma migrate devAnd again, enter a name for the migration, like "add choice":
Environment variables loaded from .env
Prisma schema loaded from db/schema.prisma
Datasource "db": SQLite database "db.sqlite" at "file:./db.sqlite"

✔ Name of migration … add choice
The following migration(s) have been created and applied from new schema changes:

migrations/
  └─ 20210412175528_add_choice/
    └─ migration.sql

Your database is now in sync with your schema.
Now our database is ready and a Prisma client is also generated. Lets move on to play with the Prisma client!
Update generated code for our model attributes
Info
Before running the app again, we need to customize some of the code that has been generated. Ultimately, these fixes will not be needed - but for now, we need to work around a couple outstanding issues.
The generated page content does not currently use the actual model attributes you defined during generation. It will soon, but in the meantime, let's fix the generated pages.
Question pages
Jump over to src/pages/questions/index.tsx. Notice that a
QuestionsList component has been generated for you:
// src/pages/questions/index.tsx

export const QuestionsList = () => {
  const router = useRouter()
  const page = Number(router.query.page) || 0
  const [{ questions, hasMore }, { isPreviousData }] = usePaginatedQuery(
    getQuestions,
    {
      orderBy: { id: "asc" },
      skip: ITEMS_PER_PAGE * page,
      take: ITEMS_PER_PAGE,
    }
  )

  const goToPreviousPage = () =>
    router.push({ query: { page: page - 1 } })

  const goToNextPage = () => {
    if (!isPreviousData && hasMore) {
      router.push({ query: { page: page + 1 } })
    }
  }

  return (
    <div>
      <ul>
        {questions.map((question) => (
          <li key={question.id}>
            <Link
              href={Routes.ShowQuestionPage({ questionId: question.id })}
            >
              <a>{question.name}</a>
            </Link>
          </li>
        ))}
      </ul>

      <button disabled={page === 0} onClick={goToPreviousPage}>
        Previous
      </button>
      <button
        disabled={isPreviousData || !hasMore}
        onClick={goToNextPage}
      >
        Next
      </button>
    </div>
  )
}
This won’t work though! Remember that the Question model we created
above doesn’t have any name field. To fix this, replace question.name
with question.text:
// src/pages/questions/index.tsx

const QuestionsList = () => {
  const router = useRouter()
  const page = Number(router.query.page) || 0
  const [{questions, hasMore}, {isPreviousData}] = usePaginatedQuery(
    getQuestions, {
      orderBy: {id: "asc"},
      skip: ITEMS_PER_PAGE * page,
      take: ITEMS_PER_PAGE,
    },
  )

  const goToPreviousPage = () => router.push({query: {page: page - 1}})

  const goToNextPage = () => {
    if (!isPreviousData && hasMore) {
      router.push({query: {page: page + 1}})
    }
  }

  return (
    <div>
      <ul>
        {questions.map((question) => (
          <li key={question.id}>
            <Link href={Routes.ShowQuestionPage({ questionId: question.id })}>
-              <a>{question.name}</a>
+              <a>{question.text}</a>
            </Link>
          </li>
        ))}
      </ul>

      <button disabled={page === 0} onClick={goToPreviousPage}>
        Previous
      </button>
      <button disabled={isPreviousData || !hasMore} onClick={goToNextPage}>
        Next
      </button>
    </div>
  )
}
Next, let’s apply a similar fix to
src/questions/components/QuestionForm.tsx. In the form submission,
replace the LabeledTextField name to be "text"
export function QuestionForm<S extends z.ZodType<any, any>>(
  props: FormProps<S>,
) {
  return (
    <Form<S> {...props}>
-     <LabeledTextField name="name" label="Name" placeholder="Name" />
+     <LabeledTextField name="text" label="Text" placeholder="Text" />
    </Form>
  )
}
createQuestion mutation
In src/questions/mutations/createQuestion.ts, we need to update the
CreateQuestion zod validation schema to use text instead of name.
// src/questions/mutations/createQuestion.ts

const CreateQuestion = z
  .object({
-   name: z.string(),
+   text: z.string(),
  })
// ...
updateQuestion mutation
In src/questions/mutations/updateQuestion.ts, we need to update the
UpdateQuestion zod validation schema to use text instead of name.
// src/questions/mutations/updateQuestion.ts

const UpdateQuestion = z
  .object({
    id: z.number(),
-   name: z.string(),
+   text: z.string(),
  })
deleteQuestion mutation
Prisma does not yet support "cascading deletes". In the context of this
tutorial, that means it does not currently delete the Choice data when
deleting a Question. We need to temporarily augment the generated
deleteQuestion mutation in order to do this manually. Open up
src/questions/mutations/deleteQuestion.ts in your text editor and add
the following to the top of the function body:
await db.choice.deleteMany({ where: { questionId: id } })The end result should be as such:
// src/questions/mutations/deleteQuestion.ts

export default resolver.pipe(
  resolver.zod(DeleteQuestion),
  resolver.authorize(),
  async ({id}) => {
+   await db.choice.deleteMany({where: {questionId: id}})
    const question = await db.question.deleteMany({where: {id}})

    return question
  },
)
This mutation will now delete the choices associated with the question prior to deleting the question itself.
updateChoice mutation
In src/choices/mutations/updateChoice.ts, we need to update the
UpdateChoice zod validation schema to use text instead of name.
// src/choices/mutations/updateChoice.ts

const UpdateChoice = z
  .object({
    id: z.number(),
-   name: z.string(),
+   text: z.string(),
  })
Remove unnecessary file
Our scaffolding created a mutation file for us that is no longer needed.
In order for yarn tsc or git push to succeed, you'll need to delete
src/choices/mutations/createChoice.ts (unused) or update the
CreateChoice zod schema to include the required fields.
Now try creating, updating, and deleting questions
Great! Now make sure you stop the application, start it again with
blitz dev in your terminal, and visit localhost:3000/questions. Try
creating questions, editing, and deleting them.
Adding choices to the question form
You’re doing great so far! The next thing we’ll do is add choices to our
question form. Open src/questions/components/QuestionForm.tsx in your
editor.
Add three more <LabeledTextField> components as choices.
export function QuestionForm<S extends z.ZodType<any, any>>(
  props: FormProps<S>,
) {
  return (
    <Form<S> {...props}>
      <LabeledTextField name="text" label="Text" placeholder="Text" />
+     <LabeledTextField name="choices.0.text" label="Choice 1" />
+     <LabeledTextField name="choices.1.text" label="Choice 2" />
+     <LabeledTextField name="choices.2.text" label="Choice 3" />
    </Form>
  )
}
Now open src/questions/mutations/createQuestion.ts and update the zod
schema so that the choice data is accepted in the mutation. We also need
to update the db.question.create() call so that the choices will be
created. After that we need to export the CreateQuestion zod schema
because we will be using it in the next step to create a validation schema
for our QuestionForm.
// src/questions/mutations/createQuestion.ts

+ export const CreateQuestion = z
    .object({
      text: z.string(),
+     choices: z.array(z.object({text: z.string()})),
    })

export default resolver.pipe(
  resolver.zod(CreateQuestion),
  resolver.authorize(),
  async (input) => {
-   const question = await db.question.create({data: input})
+   const question = await db.question.create({
+     data: {
+       ...input,
+       choices: {create: input.choices},
+     },
+   })

    return question
  },
)
Next we're going to create a separate file to store the validation schema
for our QuestionForm. In the src/questions folder create a new file
called validations.ts and move the CreateQuestion variable from
./mutations/createQuestion.ts to the new validations.ts file. Then, in
src/questions/mutations/createQuestion.ts import CreateQuestion from
../validations.
// src/questions/validations.ts

+ import * as z from 'zod';

+ export const CreateQuestion = z.object({
+ 	text: z.string(),
+ 	choices: z.array(z.object({ text: z.string() }))
+ });
// src/questions/mutations/createQuestion.ts
import { resolver } from '@blitzjs/rpc';
import db from 'db';
- import { z } from 'zod';
+ import { CreateQuestion } from '../validations';
- const CreateQuestion = z.object({
- text: z.string(),
- choices: z.array(z.object({ text: z.string() }))
- });
export default resolver.pipe(resolver.zod(CreateQuestion), resolver.authorize(), async (input) => {
// TODO: in multi-tenant app, you must add validation to ensure correct tenant
const question = await db.question.create({
data: {
...input,
choices: { create: input.choices }
}
});
return question;
});
Info
We create a shared validations.ts file because we cannot import
anything from a query (or mutation) file other than the query itself
into the client. You can read more about why in Query
Usage and Mutation
Usage.
Now open src/pages/questions/new.tsx and import CreateQuestion from
src/questions/validations.ts and set it as the schema for
QuestionForm. Also, we need set {{text: "", choices: []}} as our
initialValues for QuestionForm:
// src/pages/questions/new.tsx

+ import {CreateQuestion} from "src/questions/validations"


      <QuestionForm
        submitText="Create Question"
-       // * use a zod schema for form validation
-       //  - Tip: extract mutation's schema into a shared `validations.ts` file and
-       //         then import and use it here
-       // schema={createQuestion}
-       // initialValues={{ }}
+       schema={CreateQuestion}
+       initialValues={{text: "", choices: []}}
        onSubmit={async (values) => {
          try {
            const question = await createQuestionMutation(values)
            router.push(Routes.ShowQuestionPage({ questionId: question.id }))
          } catch (error) {
            console.error(error)
            return {
              [FORM_ERROR]: error.toString(),
            }
          }
        }}
      />
Try it out
Now you can go to localhost:3000/questions/new and create a new question
with choices!
Listing choices
Time for a breather. Go back to localhost:3000/questions in your browser
and look at all the questions you‘ve created. How about we list these
questions’ choices here too? First, we need to customize the question
queries. In Prisma, you need to manually let the client know that you want
to query for nested relations. Change your getQuestion.ts and
getQuestions.ts files to look like this:
// src/questions/queries/getQuestion.ts

const GetQuestion = z.object({
  // This accepts type of undefined, but is required at runtime
  id: z.number().optional().refine(Boolean, "Required"),
})

export default resolver.pipe(
  resolver.zod(GetQuestion),
  resolver.authorize(),
  async ({id}) => {
-   const question = await db.question.findFirst({where: {id}})
+   const question = await db.question.findFirst({
+     where: {id},
+     include: {choices: true},
+   })

    if (!question) throw new NotFoundError()

    return question
  },
)
// src/questions/queries/getQuestions.ts
interface GetQuestionsInput
extends Pick<
Prisma.QuestionFindManyArgs,
"where" | "orderBy" | "skip" | "take"
> {}
export default resolver.pipe(
resolver.authorize(),
async ({where, orderBy, skip = 0, take = 100}: GetQuestionsInput) => {
const {items: questions, hasMore, nextPage, count} = await paginate({
skip,
take,
count: () => db.question.count({where}),
query: (paginateArgs) =>
db.question.findMany({
...paginateArgs,
where,
orderBy,
+ include: {choices: true},
}),
})
return {
questions,
nextPage,
hasMore,
count,
}
},
)Now hop back to our main questions page
(src/pages/questions/index.tsx)in your editor, and we can list the
choices of each question. And add this code beneath the Link in our
QuestionsList:
// src/pages/questions/index.tsx

// ...
{
  questions.map((question) => (
    <li key={question.id}>
      <Link href={Routes.ShowQuestionPage({ questionId: question.id })}>
        <a>{question.text}</a>
      </Link>
+     <ul>
+       {question.choices.map((choice) => (
+         <li key={choice.id}>
+           {choice.text} - {choice.votes} votes
+         </li>
+       ))}
+     </ul>
    </li>
  ))
}
// ...
Restart your app — stop dev server and run yarn dev, npm dev, or
pnpm dev again. Now check /questions in the browser. Magic!
Let’s let people vote on these questions!
Open src/pages/questions/[questionId].tsx in your editor. First, we’re
going to improve this page somewhat.
Replace
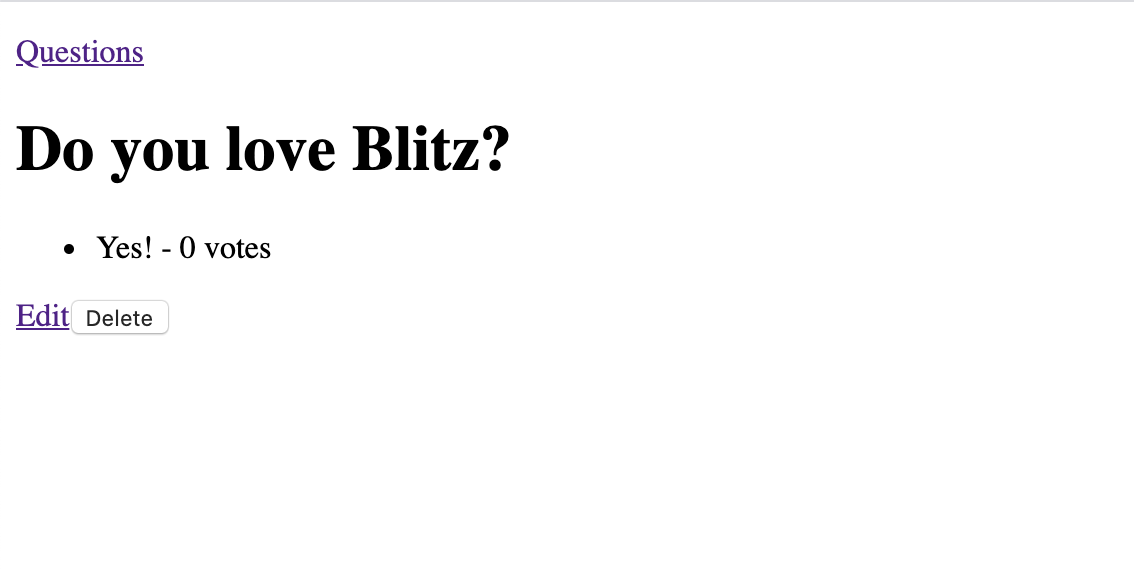
<title>Question {question.id}</title>with<title>{question.text}</title>.Replace
<h1>Question {question.id}</h1>with<h1>{question.text}</h1>.Delete the
preelement, and copy in our choices list which we wrote before:
<ul>
  {question.choices.map((choice) => (
    <li key={choice.id}>
      {choice.text} - {choice.votes} votes
    </li>
  ))}
</ul>
If you go back to your browser, your page should now look something like this!
Now it’s time to add voting!
First we need to open src/choices/mutations/updateChoice.ts, update the
zod schema, and add a vote increment.
const UpdateChoice = z
  .object({
    id: z.number(),
-   text: z.string(),
  })


export default resolver.pipe(
  resolver.zod(UpdateChoice),
  resolver.authorize(),
  async ({id, ...data}) => {
-   const choice = await db.choice.update({where: {id}, data})
+   const choice = await db.choice.update({
+     where: {id},
+     data: {votes: {increment: 1}},
+   })

    return choice
  },
)
Now go back to src/pages/questions/[questionId].tsx and make the
following changes:
In our li, add a button like so:
<li key={choice.id}>
  {choice.text} - {choice.votes} votes
  <button>Vote</button>
</li>
Then, import the updateChoice mutation we updated and create a
handleVote function in our page:
// src/pages/questions/[questionId].tsx
+import updateChoice from "src/choices/mutations/updateChoice"

//...

const Question = () => {
  const router = useRouter()
  const questionId = useParam("questionId", "number")
  const [deleteQuestionMutation] = useMutation(deleteQuestion)
  const [question] = useQuery(getQuestion, {id: questionId})
+ const [updateChoiceMutation] = useMutation(updateChoice)
+
+ const handleVote = async (id: number) => {
+   try {
+     await updateChoiceMutation({id})
+     refetch()
+   } catch (error) {
+     alert("Error updating choice " + JSON.stringify(error, null, 2))
+   }
+ }

  return (
And then we need to update the question useQuery call to return the
refetch function which we use inside handleVote:
// src/pages/questions/[questionId].tsx

//...
- const [question] = useQuery(getQuestion, {id: questionId})
+ const [question, {refetch}] = useQuery(getQuestion, {id: questionId})
//...
Finally, we’ll tell our new button to call that function!
<button onClick={() => handleVote(choice.id)}>Vote</button>The final Question component should now look like this:
export const Question = () => {
  const router = useRouter()
  const questionId = useParam("questionId", "number")
  const [deleteQuestionMutation] = useMutation(deleteQuestion)
  const [question, { refetch }] = useQuery(getQuestion, {
    id: questionId,
  })
  const [updateChoiceMutation] = useMutation(updateChoice)

  const handleVote = async (id: number) => {
    try {
      await updateChoiceMutation({ id })
      refetch()
    } catch (error) {
      alert("Error updating choice " + JSON.stringify(error, null, 2))
    }
  }

  return (
    <>
      <Head>
        <title>Question {question.id}</title>
      </Head>

      <div>
        <h1>{question.text}</h1>
        <ul>
          {question.choices.map((choice) => (
            <li key={choice.id}>
              {choice.text} - {choice.votes} votes
              <button onClick={() => handleVote(choice.id)}>Vote</button>
            </li>
          ))}
        </ul>

        <Link href={Routes.EditQuestionPage({ questionId: question.id })}>
          <a>Edit</a>
        </Link>

        <button
          type="button"
          onClick={async () => {
            if (window.confirm("This will be deleted")) {
              await deleteQuestionMutation({ id: question.id })
              router.push(Routes.QuestionsPage())
            }
          }}
          style={{ marginLeft: "0.5rem" }}
        >
          Delete
        </button>
      </div>
    </>
  )
}
Lastly, let's allow editing choices for an existing question
If you click the Edit button on one of your existing questions, you'll see it uses the same form as creating questions. So that part is already done! We only need to update our mutation.
Open src/questions/mutations/updateQuestion.ts and make the following
changes:
// src/questions/mutations/updateQuestion.ts
import {resolver} from "blitz"
import db from "db"
import * as z from "zod"

const UpdateQuestion = z
  .object({
    id: z.number(),
    text: z.string(),
+   choices: z.array(
+     z.object({id: z.number().optional(), text: z.string()}),
+   ),
  })

export default resolver.pipe(
  resolver.zod(UpdateQuestion),
  resolver.authorize(),
  async ({id, ...data}) => {
-   const question = await db.question.update({where: {id}, data})
+   const question = await db.question.update({
+     where: {id},
+     data: {
+       ...data,
+       choices: {
+         upsert: data.choices.map((choice) => ({
+           // Appears to be a prisma bug,
+           // because `|| 0` shouldn't be needed
+           where: {id: choice.id || 0},
+           create: {text: choice.text},
+           update: {text: choice.text},
+         })),
+       },
+     },
+     include: {
+       choices: true,
+     },
+   })

    return question
  },
)
upsert
is a special operation that means, "If this item exists, update it. Else
create it". This is perfect for this case because we didn't require the
user to add three choices when creating the question. So if later the user
adds another choice by editing the question, then it'll be created here.
Conclusion
🥳 Congrats! You created your very own Blitz app! Have fun playing around with it, or sharing it with your friends. Now that you’ve finished this tutorial, why not try making your voting app even better? You could try:
- Adding styling
- Showing some more statistics about votes
If you want to share your project with the world wide Blitz community there is no better place to do that than on Discord.
Visit discord.blitzjs.com. Then, post the link to the #built-with-blitz channel to share it with everyone!
Idea for improving this page? Edit it on GitHub.